
In this post I’ll show you how to ping your AutoML models from a container using Cloud Run. I’m using an AutoML model here but the approach I’m describing works with any model:

There’s a lot of content on training and optimizing ML models, but I’ve noticed less guidance on what happens after training. Productionizing and maintaining models (known as MLOps) is just as important, and this is an area I’ve been trying to learn more about recently. There are many ways to deploy ML models – here I decided to use Cloud Run to get predictions on an AutoML Tables model.
Why did I choose Cloud Run? Mostly because I had never used it before and this was a good excuse to try it out. But also:
📦 Containers! This means you can write your prediction code in any language and keep library dependencies and versions consistent.
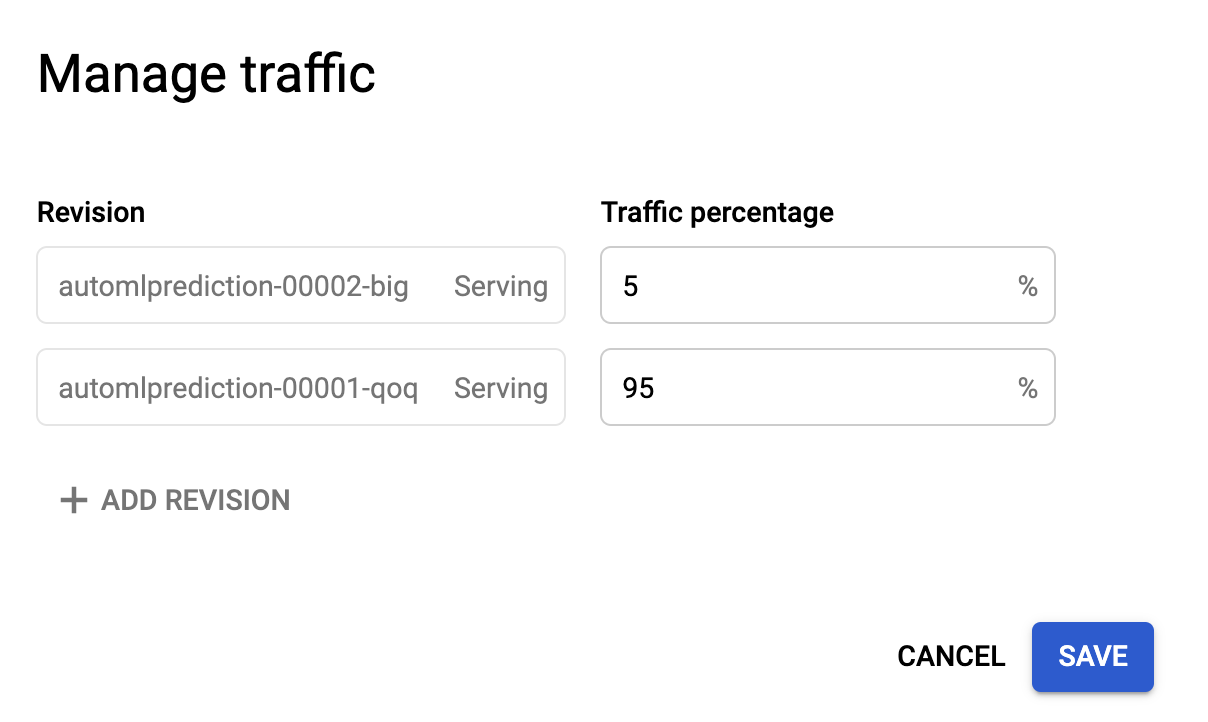
🚦Traffic splitting: When you deploy a new version you can split traffic. For example, if you want to send only 5% of your app’s traffic to the latest version to make sure it’s working ok, you can configure that right in the Cloud Run UI.
📈 Autoscaling: Only pay when your container service is invoked.
Deploying an AutoML Tables model
The prediction code I’ll show throughout this post works with any deployed AutoML Model (Vision, Video, etc.). Here I’ll show AutoML Tables. I won’t focus on model creation in this post (there’s lots of guides on this). I’ll assume you’ve got a trained model and are ready to make predictions.
For AutoML Tables, you need to explicitly deploy the model once it’s been trained, which you can do in the UI. After the model is deplyed, you’re ready to make prediction requests. Here’s how to do that in Python:
from google.cloud import automl_v1beta1 as automl

client = automl.TablesClient(project='your-gcp-project', region='your-compute-region')
response = client.predict(
    model_display_name='model-name',
    inputs=inputs,
    feature_importance=True,
)
In the code snippet, inputs is a dictionary of the inputs (or features) your model is expecting:
inputs = {
    "feature_1": 0,
    "feature_2": -0.46,
    "feature_3": 3.99,
    ...
}
You can also send an array of just the feature values (in the example above that would translate to [0, -0.46, 3.99]), but I prefer the dictionary option so I can keep track of the different features, especially if my model has a lot of them.
It’s also worth noting that the feature_importance parameter in the request means that AutoML Tables will return feature attribution values for my prediction, indicating which features influenced the model’s prediction most.
That’s all the code we need to call our model! So maybe you’re thinking: Aren’t we done? Couldn’t we just run the code above from our application without the container piece?
You could definitely stop here. But in addition to the reasons I mentioned in the intro, I’m using Cloud Run for the prediction component because it’ll help me separate the prediction functionality from the rest of my application. This means I can push updates to the prediction code, like using a new model endpoint, without affecting the rest of the app. I’ll also be able to look at logs specific to the prediction service, which will be helpful for debugging. If you’re sold, let’s move onward to conatiners.
Containerizing prediction code
To put our prediction code in a Docker container, we need to create a directory with a few files:
Dockerfile: I’ll use the same one from the Cloud Run quickstartrequirements.txt: a list of the library dependencies we’re using in our Python codeapp.py: Python code to make the prediction request
The contents of app.py will look pretty similar to the code above, with a few additions:
from google.cloud import automl_v1beta1 as automl

# TODO: replace with your own project info
project_id = 'your-project'
model_display_name = 'your-automl-model-name'

client = automl.TablesClient(project=project_id, region='us-central1')

app = Flask(__name__)
@app.route('/', methods=['GET', 'POST'])
def get_prediction():
    if request.method == 'POST':
        data = request.get_json()
        inputs = data['predict_json']
        response = client.predict(
            model_display_name=model_display_name,
            inputs=inputs,
            feature_importance=True,
        )

        # TODO: figure out what data you want to return:
        # feature importance, confidence scores, etc.
        return_json = response.payload
        return json.dumps(return_json)
We’ll put those 3 files in their own directory and cd into it. We’re ready to deploy the service.
Creating a Cloud Run service
We can deploy this with 🚀 two commands 🚀.
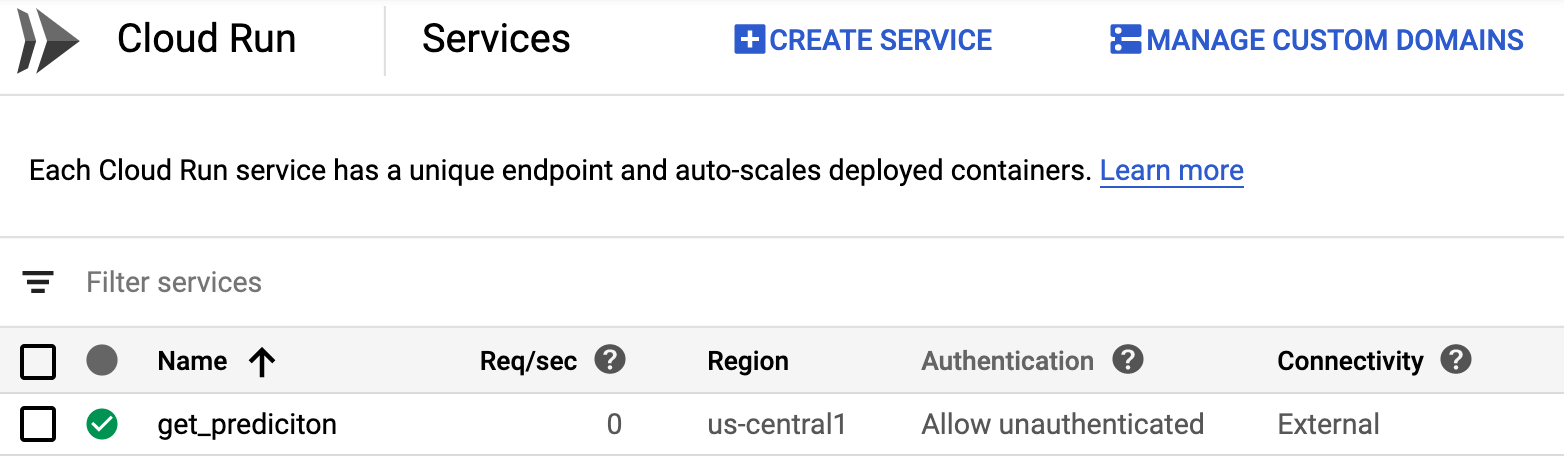
First, build the container with the command below, replacing your-project with the name of your cloud project. I’m calling the serivce get_prediction but you can call it whatever you want:
gcloud builds submit --tag gcr.io/your-project/get_predictionNext, deploy:
gcloud run deploy --image gcr.io/your-project/get_prediction --platform managedChange the authentication status of your service to Allow unauthenticated and you’re in business:
To test out the newly deploeyd service via curl, save a test example for your model to a file called test.json like this:
{
    "predict_json": {
        "feature1": 0,
        "feature2": -0.46,
        "feature3": 3.99,
        ...
    }
}
And run the following curl request, replacing the url with the url of your deployed Cloud Run service:
curl -H "Content-Type: application/json" --request POST --data @test.json https://your-cloud-run-url.app | jq "."To have even more fun with Cloud Run, you can make use of traffic splitting. This is handy if you update your service and want to test it out with a small percentage of users. All things related to traffic splitting can be configured via the UI once you’ve got more than one version deployed:
What’s Next?
Want to learn more about the tools I covered in this post? Check out these resources:
- AutoML Tables quickstart
- Cloud Run quickstart
- Tutorial by Amy on deploying an AutoML Tables model in a Cloud Run container
Got ideas for something you’d like to see in a future post, or feedback on this one? Find me on Twitter at @SRobTweets.