
Up until now I’ve been manually adjusting hyperparameters on my ML models until I’m happy with the result. But now that I’ve discovered how to automate it, I’m never going back 🎉
In this post I’ll show you how to run automated hyperparameter tuning on AI Platform via XGBoost model code packaged in a custom container. If you haven’t hit buzzword capacity yet, read on.
You might be wondering: what is a hyperparameter? And why do you need to tune it? Good question! Before I explain how to automate the tuning, let me quickly explain what hyperparameters are.
Hyperparameter tuning: the basics
When you’re building machine learning models, there are all sorts of configuration options you need to set before you start training. Things like the number of data points your model will process at once, the size of each layer, how much your model should adjust it’s learning rate, and the number of times it should iterate over all of your data. There are some rough guidelines on how to set these numbers (start with a few, small layers and build from there) but sometimes the process of setting them can seem arbitrary. These values are called hyperparameters.
Confession time: my typical workflow thus far has involved choosing hyperparameters that worked for someone else’s model on a similar task and then haphazardly adjusting those values up and down depending on the results until I was happy with the accuracy (and of course, the results of my interpretability analysis). This approach works, but it’s fairly tedious and there may be a combination of hyperparameters I never discover.
The tools
💫 Automated hyperparameter tuning to the rescue. Here are the tools I’ll be using to show you how this works:
- Dataset: I’ll train a model using a subset of the NOAA weather data in BigQuery public datasets.
- ML framework: To keep the model code short and sweet I’ll build it with XGBoost
- Containers: I’ll be containerizing the model code with Docker and hosting it on Google Container Registry
- Training & tuning: Finally, for training and hyperparam tuning I’m using Cloud AI Platform, specifically making use of custom container training and atuomated hyperparameter tuning
Will it rain in the UK today?
I’ve been visiting the UK a lot recently (it’s one of my favorite places 😀) and I thought it would be fun see if I could predict whether it would rain on a given day based on historical weather data. There’s an awesome public weather dataset available in BigQuery with weather data from all over the world going back to 1932.
To grab all weather data from the UK (filtered by lat/lng) I ran the following SQL query:
SELECT
stn, year, mo, temp, dewp, stp, visib,
wdsp, sndp, fog, b.lat, b.lon,
cast(b.elev as float64) as elev, gust,
if(prcp > 0 and rain_drizzle = "1", 1, 0) as rained
FROM `bigquery-public-data.noaa_gsod.gsod*` a
JOIN(
SELECT usaf, lat, lon, elev FROM `bigquery-public-data.noaa_gsod.stations`
) b
ON a.stn = b.usaf
WHERE lat > 50.1 AND lat < 60.1
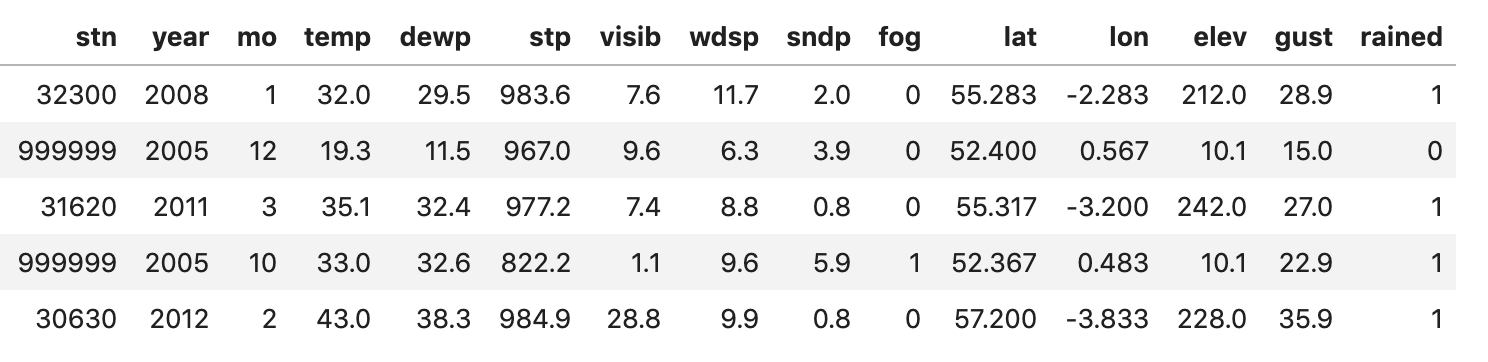
AND lon > -7.6 AND lon < 1.7I did some additional filtering to remove null values and the result is 3,881 rows of data. Here’s a preview:
With that we’re ready to build the model. And because this post doesn’t have any pictures, here’s one of me in the UK on a day that couldn’t decide if it was sunny or rainy:

Building the XGBoost model
Before we containerize things, let’s setup the data and write the XGBoost model code. First we’ll read the data in as a Pandas DataFrame and split it into train and test sets:
import os
import pandas as pd
import xgboost as xgb

from sklearn.utils import shuffle

data = pd.read_csv(os.getcwd() + '/trainer/rain_uk.csv')
data = shuffle(data, random_state=2)

labels = data['rained']
data = data.drop(columns=['rained', 'year', 'stn'])

train_size = int(len(data) * .8)
train_data = data[:train_size]
test_data = data[train_size:]

train_labels = labels[:train_size]
test_labels = labels[train_size:]
I used os.getcwd() to get the filepath so that our script will be able to access it from within the container (which we’ll create soon). Our model will be a binary classifier, predicting 0 for no rain and 1 for rain.
The code to create our XGBClassifier and train it is simple. There are a lot of optional parameters we could pass in, but for now we’ll use the defaults (we’ll use hyperparameter tuning magic later to find the best values):
bst = xgb.XGBClassifier(
    objective='binary:logistic'
)

bst.fit(
    train_data.values,
    train_labels,
    eval_metric='error',
    eval_set=[(test_data.values, test_labels)]
)
Then we can print the model’s accuracy as a percentage, along with the error value for the last training epoch:
from sklearn.metrics import accuracy_score

y_pred = bst.predict(test_data.values)
predictions = [round(value) for value in y_pred]
accuracy = accuracy_score(test_labels, predictions)
print("Accuracy: %.2f%%" % (accuracy * 100.0))

error = list(bst.evals_result_.values())[0]['error'][-1]
print('Error: ', error)
On the first attempt at training this I got an accuracy of 86% (your exact % may vary) - not bad. The last thing we’ll want to do is save our model to Google Cloud Storage. First, use argparse to pass our Cloud Storage bucket as a command line argument:
import argparse

def get_args():
    parser = argparse.ArgumentParser(description='XGB on custom containers')
    parser.add_argument(
        '--model-dir',
        default=None,
        help='The directory to store the model')
    args = parser.parse_args()
    return args
And then invoke subprocess to save the model file via gsutil:
import subprocess

# Save the model locally
bst.save_model('model.bst')

# Save to GCS
if args.model_dir:
    tmp_model_file = os.getcwd() + '/model.bst'
    subprocess.check_call([
        'gsutil', 'cp', tmp_model_file,
        os.path.join(args.model_dir, 'model.bst')])
Using Cloud hyperparameter tuning
Time to add the hyperparameter tuning code! For that we’ll be using the hypertune package made available by Google Cloud. To use it there are a few steps:
- Choose the hyperparameters you want to tune
- Create a
config.yamlfile with the guidelines for tuning those parameters - Add some
hypertunecode to your model script to use those hyperparameters in your training - Submit the training job to Cloud AI Platform
Which parameters will we tune?
You can see the full list of parameters for XGBClassifier in the docs. We’ll experiment with two:
max_depth: the maximum tree depth for our model, default is 3 (remember XGB is a boosted tree framework, more on that here)learning_rate: how much our model’s weights will change every time they’re updated, default is 0.1
Now that we’ve chosen the hyperparameters we want Cloud to find the optimal values for, we can create a config file with some guidelines for tuning. Remember above when we calculated the error of our trained XGB model? That’s a number we want to minimize. We’ll pass this to the hypertune service, so it has a metric for judging the success of each training run (called a trial).
Here’s what our config file looks like:
trainingInput:
  hyperparameters:
    goal: MINIMIZE
    hyperparameterMetricTag: "error"
    maxTrials: 10
    maxParallelTrials: 2
    enableTrialEarlyStopping: True
    params:
    - parameterName: max-depth
      type: INTEGER
      minValue: 3
      maxValue: 10
    - parameterName: learning-rate
      type: DOUBLE
      minValue: 0.01
      maxValue: 0.9
It’s pretty easy to understand, but here’s a bit more detail on the maxParallelTrials config: hypertune can run multiple trials in parallel. The benefit of this is that your job will finish faster but the service can only optimize values based on data from completed trials, so this is a tradeoff you’ll want to consider.
Adding hypertune code
To add our hyperparameters to our model code, we’ll parse them as command line arguments by adding them to the get_args() function defined above:
parser.add_argument(
    '--max-depth',
    help='Max depth of XGB tree',
    default=3
)
parser.add_argument(
    '--learning-rate',
    help='Learning rate of XGB model',
    default=0.1
)
Note that the names of the parameters here correspond with what we’ve defined in our config file. We’ll call this function at the beginning of our main method:
def main():
  args = get_args()
  # Data + model code goes here..
Next we want to send the hypertune metrics to Cloud. We’ll add some code to do that after training and calculating evaluation metrics:
hpt = hypertune.HyperTune()
hpt.report_hyperparameter_tuning_metric(
    hyperparameter_metric_tag='error',
    metric_value=error,
    global_step=1)
Since you don’t need to set the number of epochs for XGBoost I’ve set the global_step to 1. The hyperparameter_metric_tag correpsonds to our config file.
Finally, add the args created above to your model training code:
bst = xgb.XGBClassifier(
    objective='binary:logistic',
    max_depth=args.max_depth,
    learning_rate=args.learning_rate
)
When we kick off our hyperparameter training job, it’ll change max_depth and learning_rate for each training trial.
Time to containerize 📦
I decided to containerize the model code to try out the custom container training feature on Cloud AI Platform (also because I’ve never played with Docker and this seemed like a good excuse). Learning all these new tools was surprisingly frictionless.
You don’t have to use a custom container to train an XGBoost model on AI Platform, but I’ve used it here to show you how it works. And the cool thing about custom containers is that you can write an ML pipeline using whatever framework you’d like and it’ll train on AI Platform. The possibilities are endless.
So far we’ve created a single Python file with our model code and config.yaml with our hypertune configs. We’ll now package up the code:
- Dockerfile (we’ll write this next)
- config.yaml
- trainer/
- model.py
- rain_uk.csv (our data file)
Writing the Dockerfile
In our Dockerfile we’ll include all the commands needed to run our image. It’ll install all the libraries we’re using and set up the entry point for our training code.
You can find the Dockerfile I used for this here.
Pushing to Google Container Registry
To use our container we need to first build it. If you haven’t already, you’ll want to run gloud auth configure-docker to connect gcloud with your Docker credentials.
Then you’ll build your container passing it the url of your image in Google Container Registry (details on the format below):
export IMAGE_URI=gcr.io/your-gcp-project/your-repo-name:image_tag
docker build -f Dockerfile -t $IMAGE_URI
You can choose whatever you’d like for the image repo name and tag. Next, test the container by running it locally:
docker run $IMAGE_URIAnd push it to Container Registry:
docker push $IMAGE_URIWith that we’ve set up everything we need to start training (and automated tuning, obvs 🔧).
Let the automated hyperparameter party begin
You can kick off the training job with a single gcloud command. Update this with the name of your training job (can be anything you want), the region you’d like to run it in, your image URI, and the storage bucket to write model artifacts to:
gcloud ai-platform jobs submit training $JOB_NAME \
  --scale-tier BASIC \
  --region $REGION \
  --master-image-uri $IMAGE_URI \
  --config config.yaml \
  -- \
  --model-dir="gs://$BUCKET_NAME/$MODEL_DIR"
Next head over to the AI Platform > Jobs section of your console and select the job you just kicked off. In this job details view, you should see a table where your hypertune summary will be logged as trials complete:
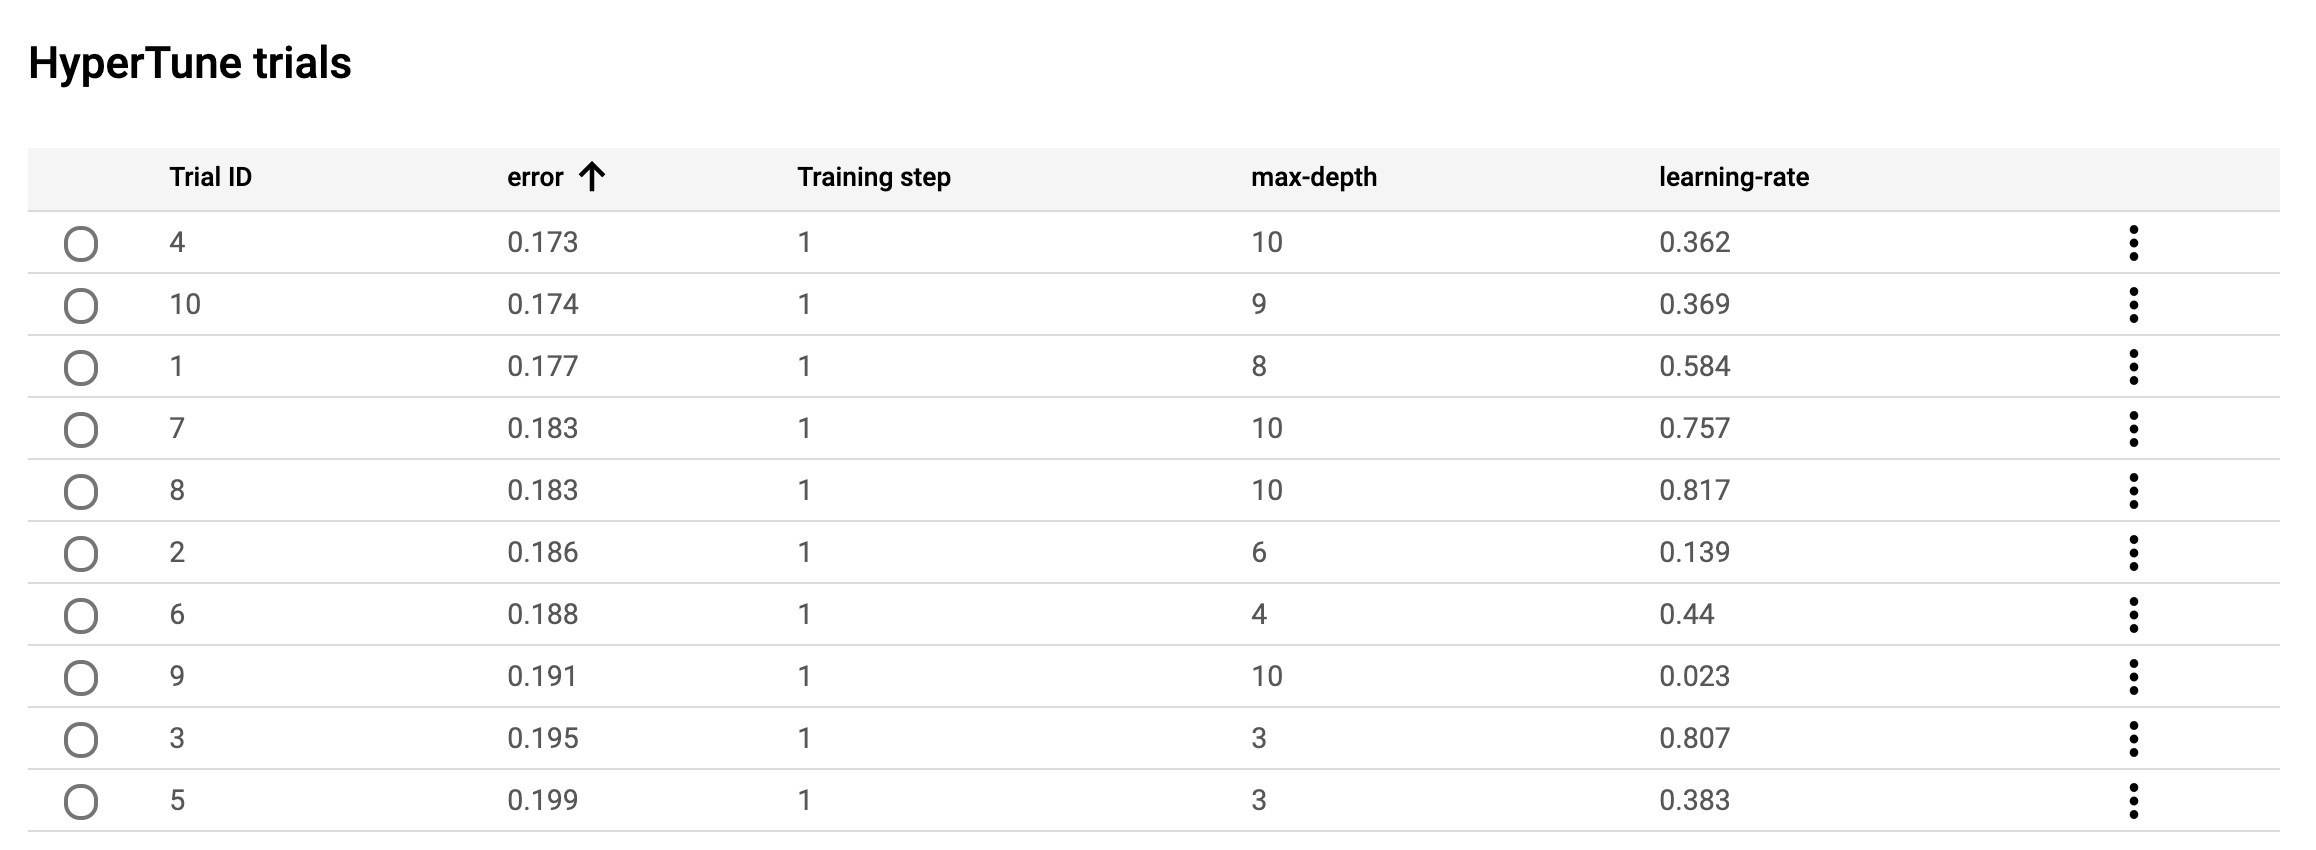
You can refresh this page as training continues to see the results of the latest trial. In the screenshot above I’m sorting by lowest error (the thing I’m trying to minimize). You can also click View logs to monitor your job as it trains.
Looks like my best trial was #4, using a max_depth of 10 and a learning rate of 0.362. I updated my model to use those parameters, then re-ran training and accuracy increased to 90% - quite an improvement! There are obviously many more hyperparameters I could tune, which might improve my accuracy even more.
It would have taken ages for me to find this combination of hyperparams on my own, which is the best part of automated hyperparameter tuning. There’s also a lot of magic happening under the hood in how hypertune updates your hyperparameters after each trial. It does this using Bayesian optimization, which I won’t pretend to be an expert in so instead I’ll just link you to this blog post.
Learn more
If you’ve made it this far in the post, tweet me “I’m hyped about hypertune!” In all seriousness, here are some useful resources if you want to start using these tools on your own models:
- Guide to custom containers on AI Platform
- Guide to hyperparameter tuning on AI Platform
- Weather dataset in BigQuery
I’m always open to feedback and suggestions for future posts (and cool datasets, because there are never enough). Let me know what you think on Twitter at @SRobTweets.